
Office cleaning
Why Textured Vinyl Wallcovering Looks Streaky After Cleaning
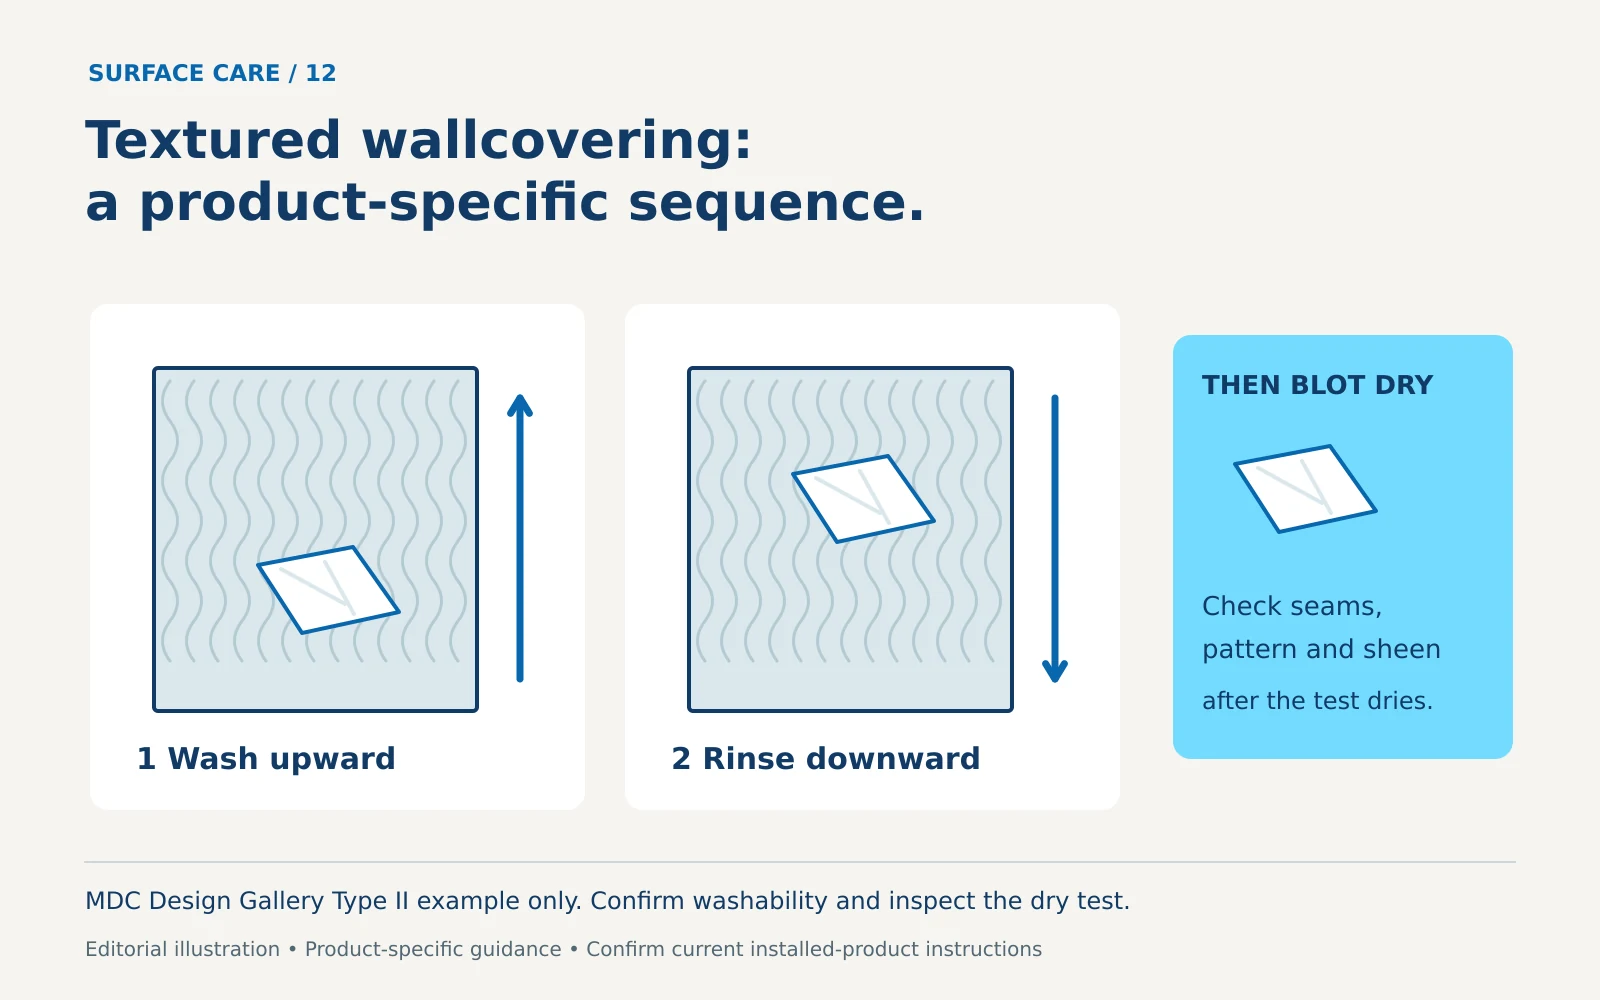
Textured vinyl wallcovering can look streaky when cleaning leaves residue in the pattern or produces uneven results. Before adding more cleaner, confirm the installed wallcovering is washable and inspect the dry surface. A color change, lifted seam or damaged print calls for a stop and review rather than another full-wall treatment.
Confirm what covers the wall
Find the finish schedule, sample book reference or installer's record. Record the maker, collection, product number and applicable care sheet. “Vinyl-looking” does not establish washability: paper, textile, cork and specialty finishes require different decisions.
Also establish whether the material is newly installed and whether the installer has released it for cleaning. Check seams, corners and previously repaired areas visually. Do not lift an edge to identify the backing. Photograph the streaks under normal room lighting and note where the previous cleaning began and ended.
Ask what was used on the last visit, including product, dilution, tool and whether the surface was rinsed. An unknown previous treatment is a reason for a careful test and clarification, not permission to layer a different product over it.
Follow the identified product's sequence
For its Design Gallery Type II wallcovering, MDC describes mild soap and warm water, with a bristle brush when necessary for deep texture. It specifies washing upward from the bottom, then rinsing downward from the top with clean water and blotting dry with a lint-free towel. Embossed recesses need attention because they can retain suds and loosened dirt. The guide rejects abrasive and active-solvent preparations and discourages wax or protective coatings. These directions belong to that identified washable product family; they are not universal wallcovering instructions. Read MDC's Design Gallery care guide.
Use a small correction trial
Choose an inconspicuous, intact area representative of the streaked section. Protect adjacent trim, floor finishes and nearby electrical fittings from runoff. Define a manageable test boundary so the result can be compared with untouched material after drying.
Use only the procedure approved for the installed product. Keep the trial's product and tools recorded; changing several things at once makes it difficult to tell what helped. Review the dry result for remaining lines, new gloss, color loss and seam movement. Stop if the pattern transfers, the finish changes, a seam lifts or the result becomes less uniform.
If the small trial removes visible residue without altering the finish, have the responsible person approve extending that same process to the agreed area. If it does not, seek product-specific advice. More detergent is not a diagnosis, and a shiny surface is not proof that a damaged finish has been restored.
Example for a reception wall
A reception feature wall looks clean head-on but shows vertical bands beside the afternoon window. The facility record identifies the exact Type II wallcovering. A controlled trial follows its care sheet and is inspected dry in both normal room lighting and the light that revealed the issue. The manager accepts the result before the rest of the agreed section is treated.
If the bands persist or reveal a change in print or sheen, the report should retain the location, photographs and prior-treatment details for the supplier. Avoid promising that a full-wall repeat will solve an unexplained result.
Use this completion checklist:
- Product and care sheet match the installed wall
- Seams and existing defects documented
- Prior cleaner identified where possible
- Test inspected after drying
- Approved area completed without uncontrolled runoff
- Persistent streaks or finish changes reported
For office/business or post-construction cleaning in Orange County, Chino Hills, Chino, Ontario, Corona or Eastvale, request a JLV quote with the wallcovering specification and photos. Confirm the permitted finish-care scope before work begins.